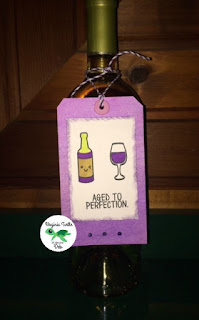
Hope everyone is enjoying their Sunday!! Deb 1 here sharing a Wine Tag featuring the "Cheers" stamp set from Virginia Turtle Stamps! I will be using tags like this to give wine to my "hard to buy for" family and friends.
The background of the tag, was made using Gelatos. Gelatos are a great product and very easy to use. This is only one of the many ways to use this product and it's quick and easy to do!
The supplies you will need are: Watercolor paper, Gelatos (your choice of colors), and baby wipes.
The next step is to take a baby wipe to start blending the color. I begin at the bottom and blend the colors up, but it is personal preference. It doesn't matter if you start at the top or the bottom. So what you do is just take your baby wipe and wipe it back and forth over the color. Do not press too hard or you will remove all of the color. You can also go in circular motion too.
When you get to the second color, just blend it in with the first and continue blending through the colors. If the wipe gets too dry, it will not blend. Just use a different spot and continue.
When you get to the last color you can blend some of it down, or just leave it as is. Just make sure that the scribbles aren't real noticeable. If you see a spot that you don't like, or have removed too much color in one area, you can always reapply more color and resume blending. When you are done you should have something that looks like this.
At this point, you can cut it into any shape you want and use for your next project! I hope this was helpful! I find it a quick and easy way to make a background in a hurry!


Love it, thank you. I have 16 of these in my box and really haven't used them. Time to get messy!!!
ReplyDeleteAwesome! I love how it turned out! Thanks for showing how easy it can be!
ReplyDelete